Continuous Integration with Jenkins Pipeline - Part 3
In previous post, I have discussed on setting Jenkins master and slave server communication and credential management in Jenkins. In this post I will discuss on setting up tomcat in application server and integrating app server with jenkins slave. Also we will choose a java sample app that is going to be part of CI/CD process. Check this post to install tomcat in app server.
Need
- App server (Linux Server where application will run)
- SSH access to app server
- Jenkins user ssh public key of Jenkins Slave machine
- Personal GitHub Account
Allow Jenkins Slave to SSH into App Server
To automate deployment process from jenkins slave to app server we must allow SSH from jenkins slave to app server. At first gather jenkins user ssh public key from jenkins slave machine as just we did in previous post,
1
2
3
4
ubuntu@jenkins-slave:~$ sudo su - jenkins
jenkins@jenkins-slave:~$ cat .ssh/id_rsa.pub
jenkins@jenkins-slave:~$ exit
ubuntu@jenkins-slave:~$ exit
Then use that key in the app server as following,
1
2
3
ubuntu@app-server:~$ mkdir -p ~/.ssh
ubuntu@app-server:~$ vim ~/.ssh/authorized_keys
ubuntu@app-server:~$ exit
Next, test the SSH connection from jenkins slave to app server
1
2
ubuntu@jenkins-slave:~$ sudo su - jenkins
jenkins@jenkins-slave:~$ ssh ubuntu@APP_SERVER_IP
If login is successful then proceed to next task.
Choose Sample Java Application and Run in Local Machine
We will use Jhipster sample application in CI/CD process. To run the app, you need java and yarn to be installed in the machine. Installing java has already been covered in the first part of this series. Install yarn using following command,
1
2
3
ubuntu@local-machine:~$ curl -sS https://dl.yarnpkg.com/debian/pubkey.gpg | sudo apt-key add -
ubuntu@local-machine:~$ echo "deb https://dl.yarnpkg.com/debian/ stable main" | sudo tee /etc/apt/sources.list.d/yarn.list
ubuntu@local-machine:~$ sudo apt-get update && sudo apt-get install yarn -y
Now, clone the app from GitHub and run in local machine,
1
2
3
4
5
ubuntu@local-machine:~$ git clone https://github.com/jhipster/jhipster-sample-app.git
ubuntu@local-machine:~$ cd jhipster-sample-app
jhipster-sample-app:~/jhipster-sample-app$ yarn install
jhipster-sample-app:~/jhipster-sample-app$ ./mvnw -Pprod clean package -DskipTests
jhipster-sample-app:~/jhipster-sample-app$ java -jar target/jhipster-sample-application-0.0.1-SNAPSHOT.war
If everything is fine, then app should be running on port 8080.
Configure GitHub for SSH from Jenkins Slave
After running the app in localhost we need to fork the app into our personal GitHub account. After forking the app we will able to clone the app from our account with SSH. Moreover, we will also setup GitHub webhook to make jenkins build automatically when new git push operation is executed on sample app repository. Follow below screenshots to add jenkins slave key in the github sample app repository,
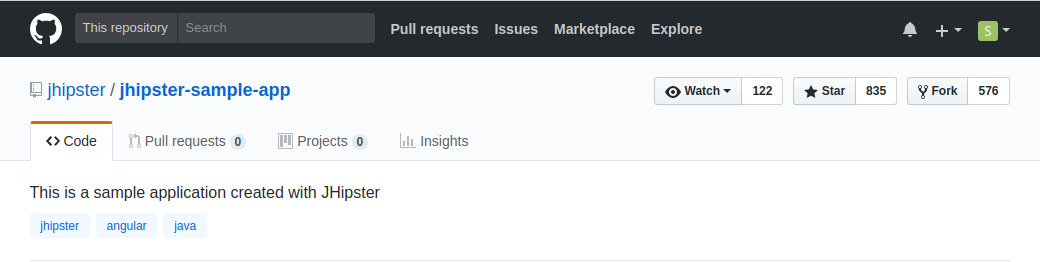 Fork JHipster App
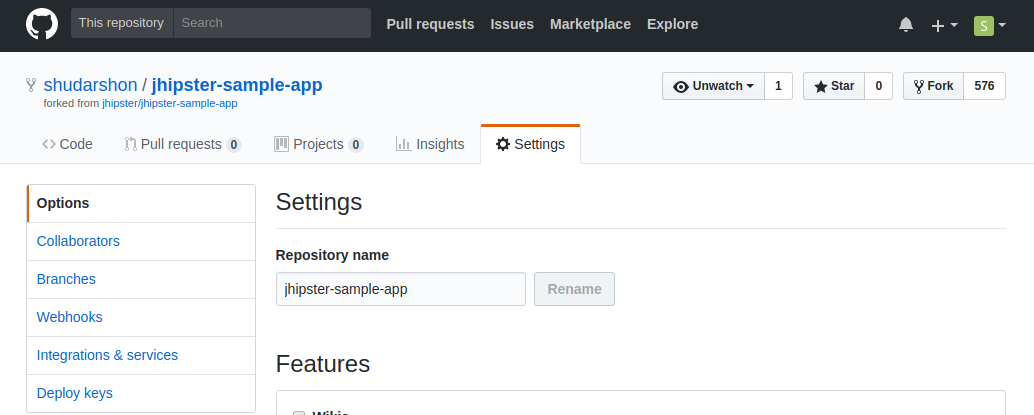 Click on Settings
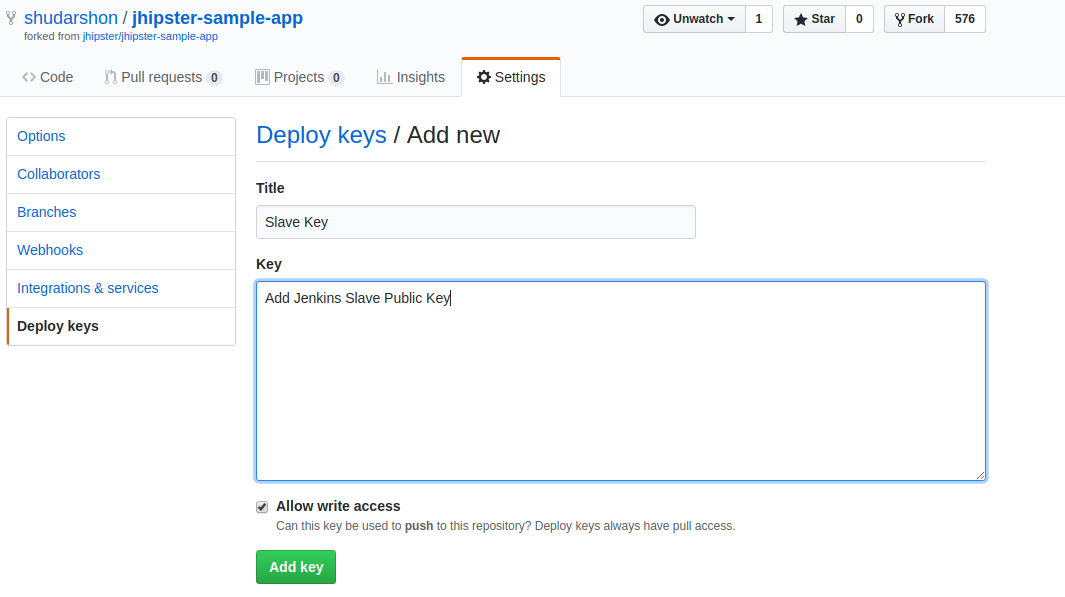 Click Deploy Under Settings and Add Jenkins Slave Public Key
Verify SSH from Jenkins Slave to GitHub
If you have accomplished all of the above now it is time to SSH connectivity from Jenkins Slave to Github Account.
1
2
ubuntu@jenkins-slave:~$ sudo su - jenkins
jenkins@jenkins-slave:~$ ssh -T git@github.com
The above command should return success message regarding SSH connection to GitHub. In the next post, I will discuss on configuring Jenkins Pipeline and adding webhook configuration with GitHub.
Comments